ZHUOXIN-ZAUN
INSTALLATIONSANWEISUNGEN
1. ZAUNLAYOUT VORBEREITEN
SCHRITT 1
Ermitteln Sie die Grenzlinien Ihres Grundstücks.
SCHRITT 2
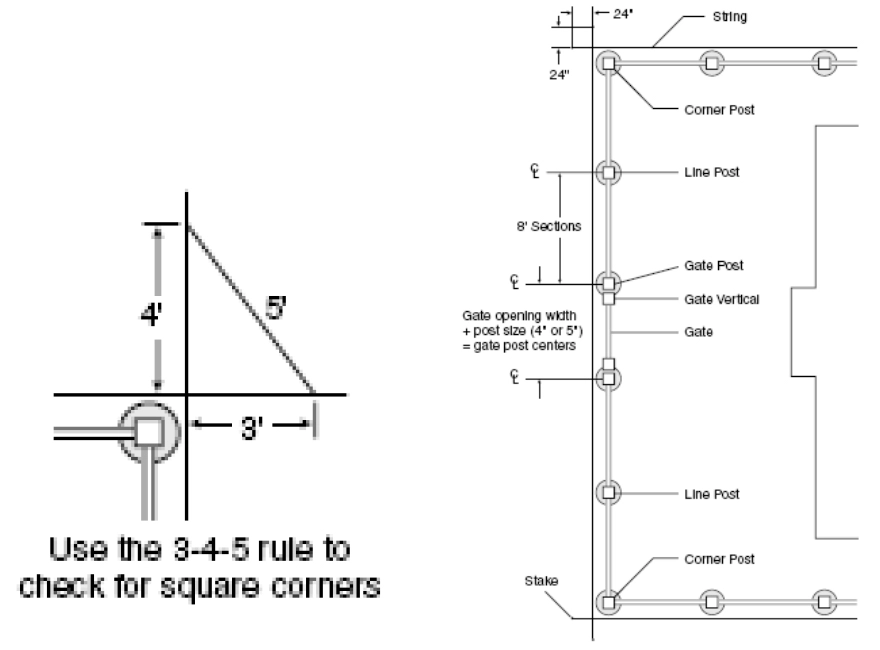
Schlagen Sie entlang der Grundstücksgrenze Pfähle in den Boden und spannen Sie zwischen jedem Pfahl eine Schnur. Achten Sie darauf, die Schnur etwa 24" über die Grundstücksgrenze hinaus zu verlängern (Abb. 1). Es wird empfohlen, alle Pfähle ca. 6" innerhalb der Grundstücksgrenze zu setzen, damit die Betonfundamente nicht auf das Nachbargrundstück ragen.
SCHRITT 3
Markieren Sie die Position jedes Endpfostens mit einem Pflock (Eck-, End- und Torpfosten werden als Endpfosten bezeichnet). Wenn Sie die Position der Torpfosten bestimmen, beziehen Sie sich auf den Abschnitt Privacy Gate für die tatsächliche Toröffnung.
2. SETZEN VON KLEMMPOSTEN
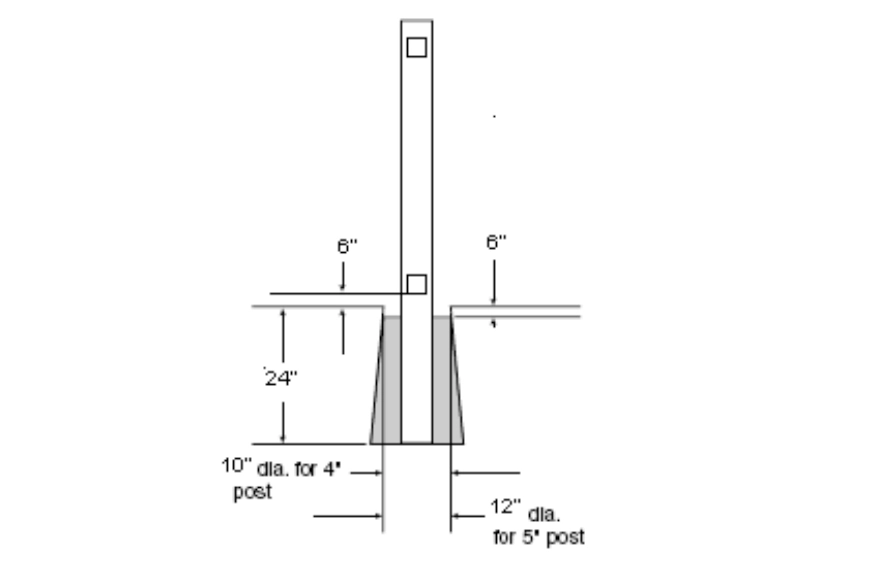
Although post depth and hole diameter will be determined by local weather and soil conditions, holes for terminal posts and line posts are typically dug 10” diameter and 30” deep with sloped sides (Fig.2). Post holes should be min. 10″ in diameter for standard 4″ x 4″ posts and 12″ in diameter for 5″ x 5″ posts. Set posts in concrete to a min. depth of 24″.
SCHRITT 1
Graben Sie alle Löcher für die Endpfosten.
ALLE ENDPFOSTEN EINBETONIEREN.
SCHRITT 2
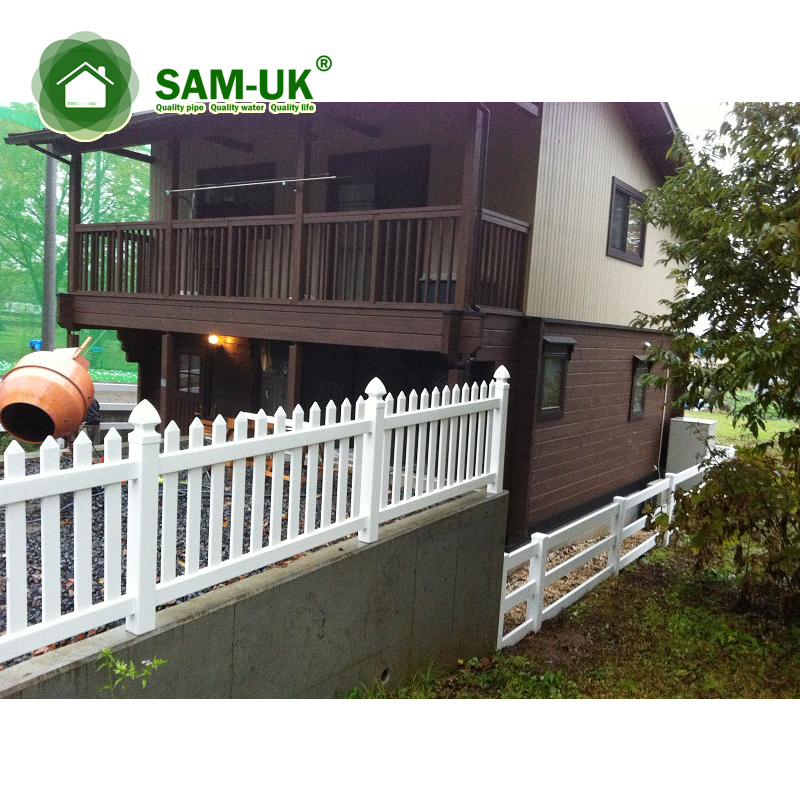
Position the post in the hole. The posts should be centered in the hole and must be square with the fence line so that when the rails are inserted into the posts they will parallel the string line. Check the post on two adjacent sides with a carpenter’s level and adjust as necessary to make sure it is plumb. The fence height above grade is determined at this time as well. We recommend 2” be left from the bottom of the bottom rail to the ground.
SCHRITT 3
Gießen Sie den Beton um den Pfosten herum und füllen Sie ihn bis zu einer Höhe von 2" unter dem Boden auf. Sobald der Beton vollständig getrocknet ist, füllen Sie den Rest des Lochs mit Erde auf.
3. AUFFINDEN UND SETZEN VON LEITPFOSTEN
SCHRITT 1
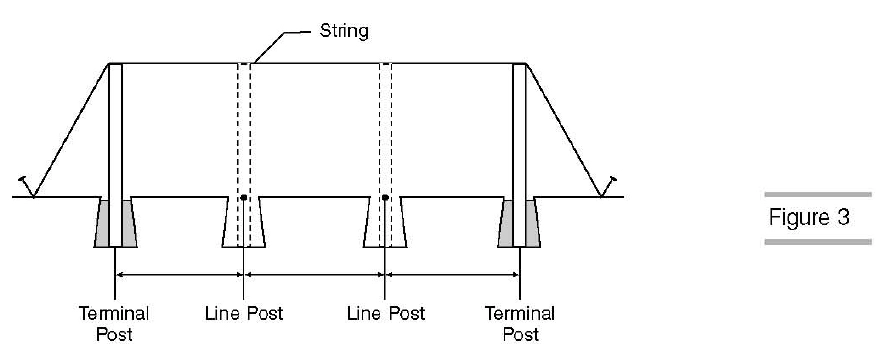
Nachdem die Fundamente der Endpfosten so weit ausgehärtet sind, dass die Pfosten stabil bleiben, befestigen Sie einen Pfahl und spannen eine Schnur über die Oberseite der Pfosten, um die gewünschte Höhe der Pfosten zu markieren (Abb.3).
SCHRITT 2
Arbeiten Sie entlang der Schnurlinie und stecken Sie die Position aller Schnurpfähle ab.
SCHRITT 3
Graben Sie alle Löcher für die Leitungspfosten.
4. SETTING LINE POSTS AND RAILS
SCHRITT 1
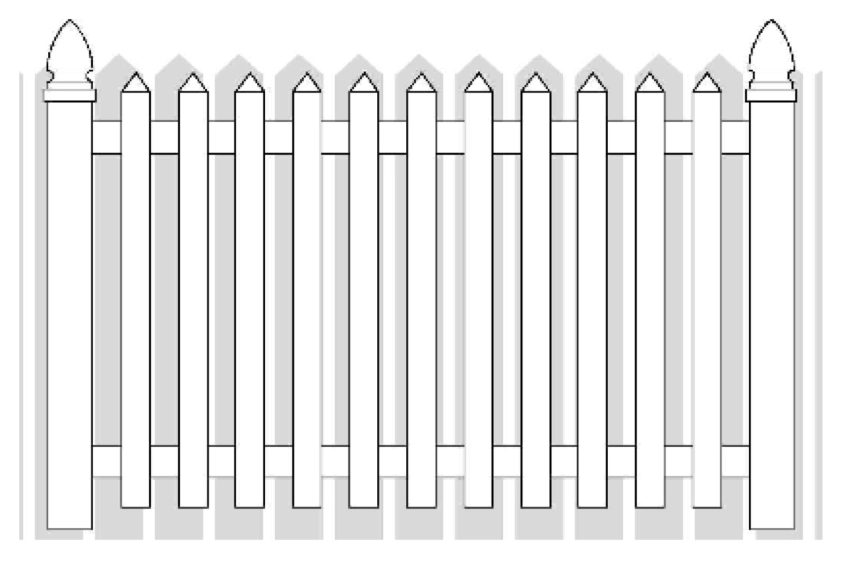
If post spacing is less than 8’ on center, you may need to cut some from each end of rail to ensure that the distance from the post to the first picket remains equal on each end (Fig.4).
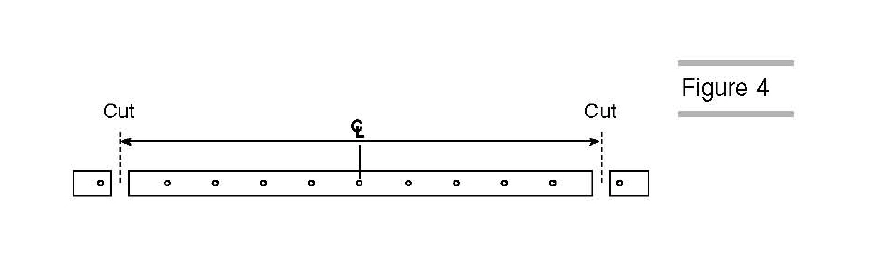
The length of the top and bottom rails should be 1/2” less than the center-to-center measurement of the posts.
SCHRITT 2
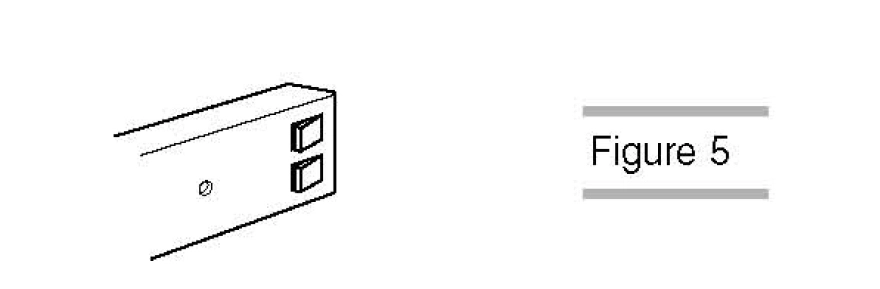
If the rail is going into a post that will be filled with concrete, seal the end of the rail with duct tape to prevent concrete from flowing into it (Fig.5).
SCHRITT 3
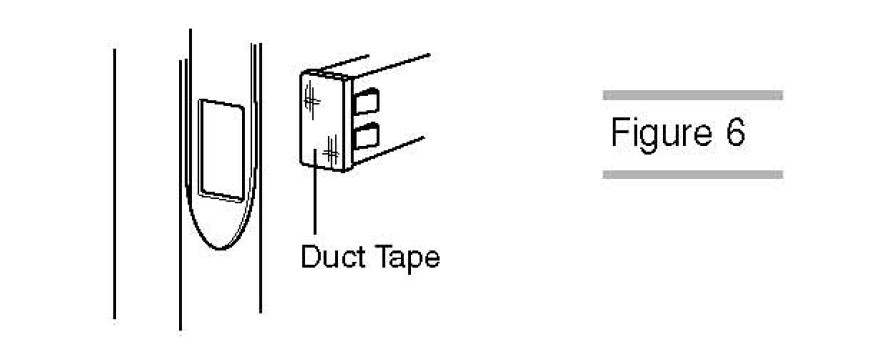
Starting at the terminal post, slide the bottom rail into the bottom hole in the post. Proceeding down the fence line, place the next post into the next hole and insert the loose end of the bottom rail into the post (Fig.6).
SCHRITT 4
Fill the post hole with concrete.
Check to make sure that the post is set at the correct height, is plumb and level and square to the fence line. Block and support as necessary to keep the posts stable as installation continues.
Repeat these steps until all posts are set with the bottom rails and inserts installed.
5. INSTALLING PICKETS
SCHRITT 3
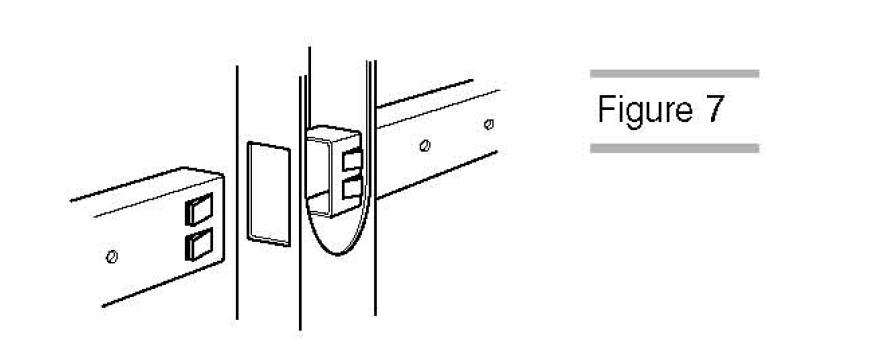
Insert the top rail into the post (Fig.7)
Install pickets with caps into the rail holes processed in the factory one by one.
Repeat these steps until all pickets have been assembled.
6. REINFORCE GATE POSTS
Gate posts should be filled to within 2” of the top of the post with concrete and re-bar. Corner posts and end posts should be filled half-way with concrete only. Line posts do not need to be filled. Make sure the gate hardware is installed before filling gate posts with concrete.
SCHRITT 1
NOTE: If re-bar is not being used, processed to step 2.
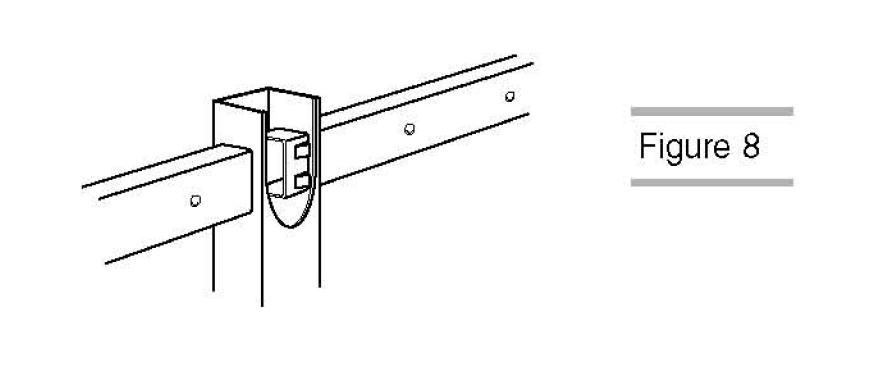
For each end and gate post cut two pieces of #4 re-bar 4” shorter than the post length. Drop two pieces into each post at opposing corners (Fig.8)
SCHRITT 2
Using a large funnel, fill the posts with concrete (Fig.9). Tap lightly on the sides of the post to help void air pockets in the concrete.
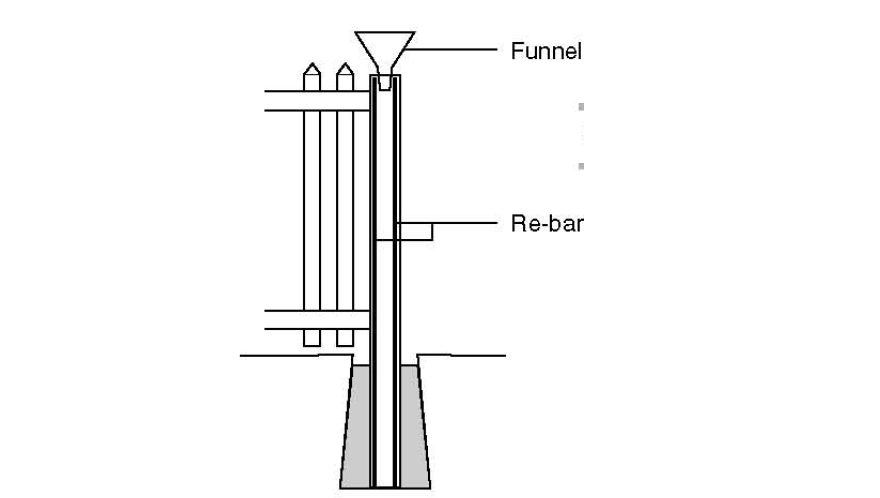
SCHRITT 3
Clean up excess concrete with water before it dries.
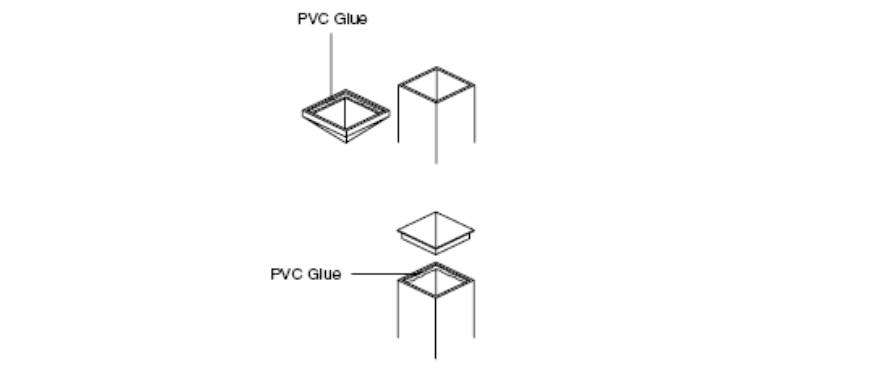
7. ATTACH THE POST CAPS
Kleben Sie die Kappen mit einem als Heißkleber" eingestuften PVC-Kleber mit UV-Bestimmung auf die Pfosten.
8. CLEAN UP
Reinigen Sie das PVC-Material bei Bedarf mit einer nicht scheuernden (oder leicht scheuernden) milden, biologisch abbaubaren Seife und einem weichen Kunststoff-Scheuerschwamm. Gründlich mit sauberem Wasser abspülen, um Schmutz und Seife zu entfernen.