
- All
- Product Name
- Product Keyword
- Product Model
- Product Summary
- Product Description
- Multi Field Search

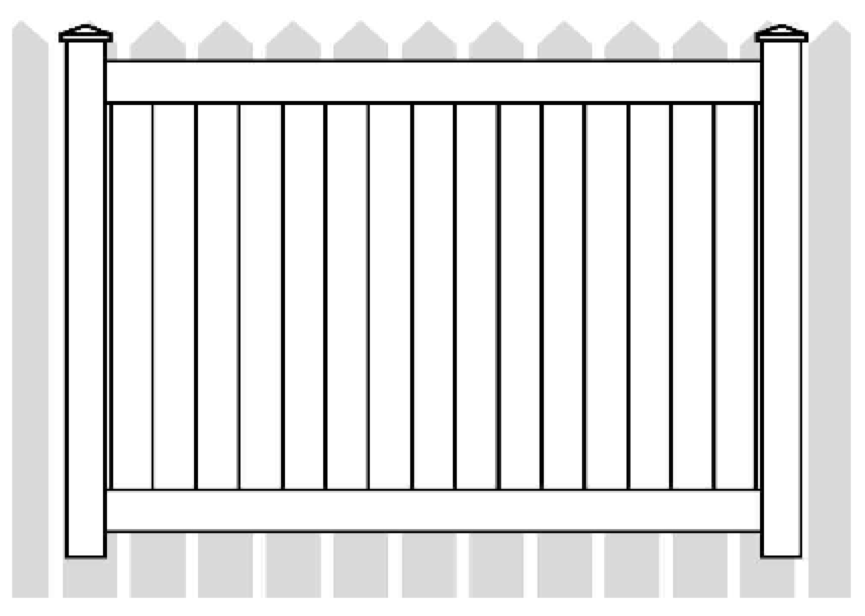
ZHUOXIN FENCE
PRIVACY PANEL
INSTALLATION INSTRUCTIONS
1. PREPARE FENCE LAYOUT
STEP 1
Locate the boundary lines to your property.
STEP 2
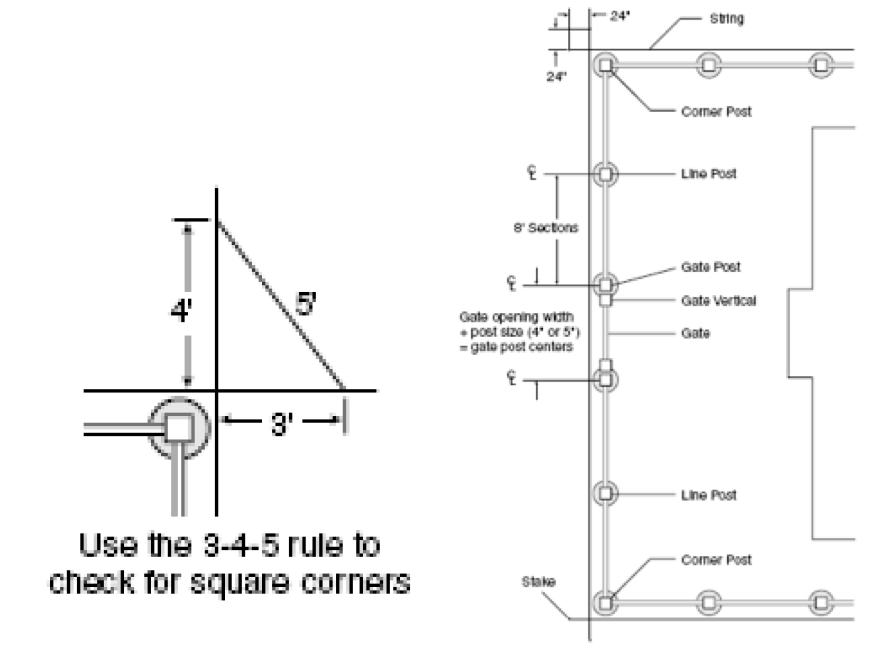
Drive stakes into the ground along the property line and stretch a string between each stake. Be sure to extend the string about 24” beyond the property line (Fig.1). It is recommended that all posts be set approximately 6” inside of the property line so that concrete footings do not encroach onto the adjoining property.
STEP 3
Make the location of each terminal post with a stake (corner, end and gate posts are called terminal posts.) When determining the position of the gate posts, refer to Privacy Gate section for actual gate opening.
2. SETTING TERMINAL POSTS
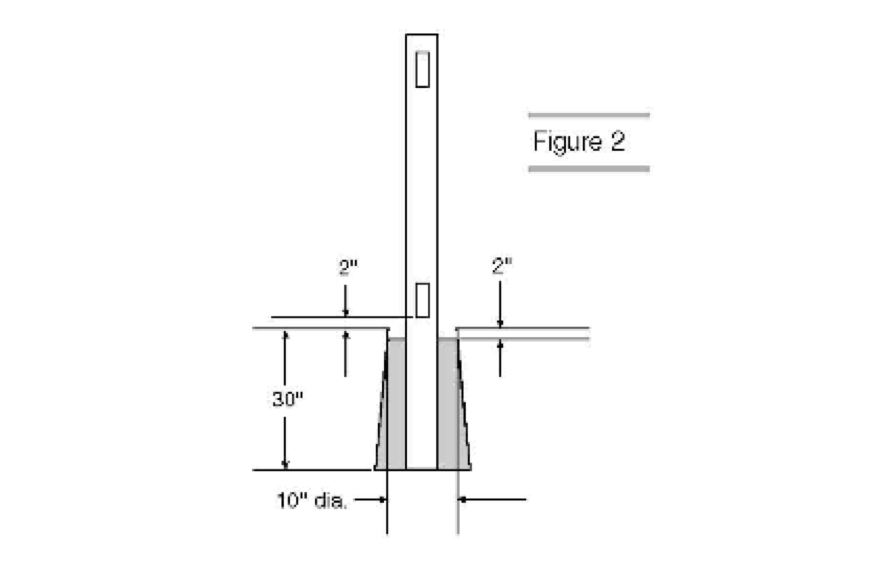
Although post depth and hole diameter will be determined by local weather and soil conditions, holes for terminal posts and line posts are typically dug 10” diameter and 30” deep with sloped sides (Fig.2). Post holes should be min. 10" in diameter for standard 4" x 4" posts and 12" in diameter for 5" x 5" posts. Set posts in concrete to a min. depth of 24".
STEP 1
Dig all terminal post holes.
SET ALL TERMINAL POSTS IN CONCRETE.
STEP 2
Position the post in the hole. The posts should be centered in the hole and must be square with the fence line so that when the rails are inserted into the posts they will parallel the string line. Check the post on two adjacent sides with a carpenter’s level and adjust as necessary to make sure it is plumb. The fence height above grade is determined at this time as well. We recommend 2” be left from the bottom of the bottom rail to the ground.
STEP 3
Pour concrete around post, fill the balance of the hole with dirt.
3. LOCATING AND SETTING LINE POSTS
STEP 1
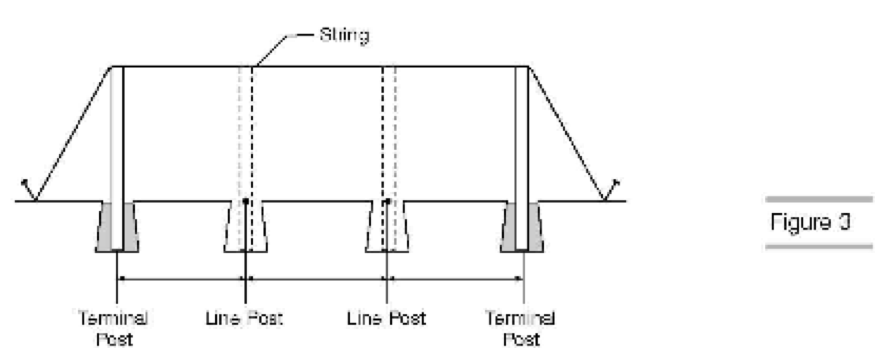
After the terminal post footings have hardened enough for the posts to remain stable, stake and stretch a string line taut across the tops of the posts to mark the desired height of the line posts (Fig.3).
STEP 2
Working along the string line, stake out the position of all line posts.
STEP 3
Dig all line post holes.
4. SETTING LINE POSTS AND RAILS
STEP 1
If post spacing is less than 8’ on center, cut a piece from the end of the top and bottom rails to achieve the desired length.
The length of the top and bottom rails should be 1/2” less than the center-to-center measurement of the posts.
STEP 2
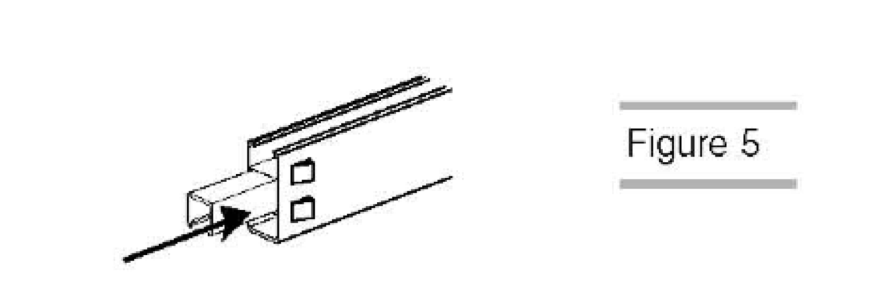
Starting at terminal post, slide the metal insert into the bottom rail (Fig.5).
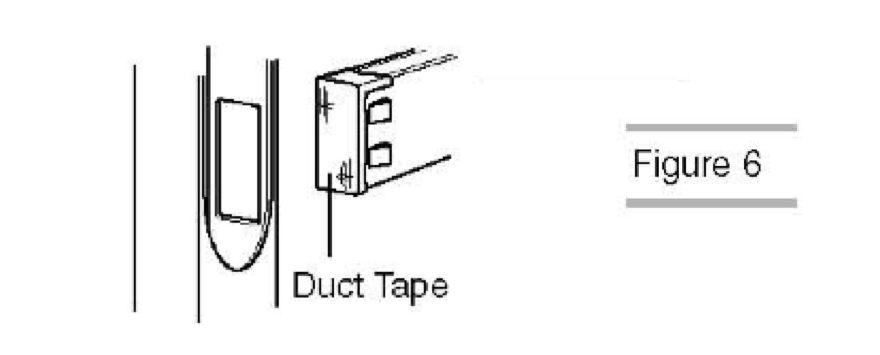
If the rail is going into a post that will be filled with concrete (refer to section 6, ‘FILLING POST WITH RE-BAR & CONCRETE’), seal the end of the rail with duct tape to prevent concrete from flowing into it (Fig.6).
STEP 3
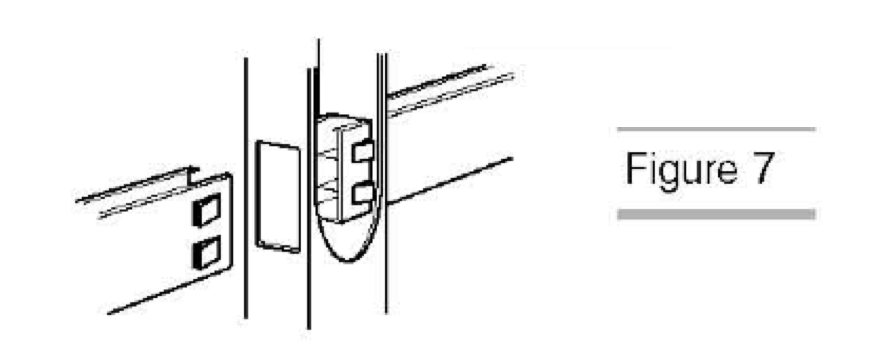
Slide the rail into the bottom hole in the post (Fig.7). Proceeding down the fence line, place the next post into the next hole and insert the bottom rail into the post.
STEP 4
Fill the post hole with concrete.
Check to make sure that the post is set at the correct height, is plumb and level and square to the fence line. Block and support as necessary to keep the posts stable as installation continues.
Repeat these steps until all posts are set with the bottom rails and inserts installed.
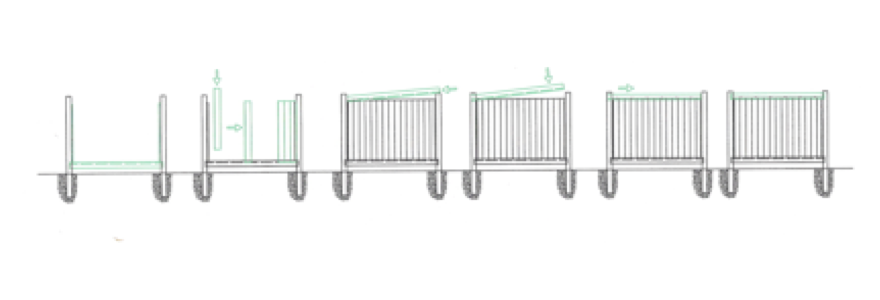
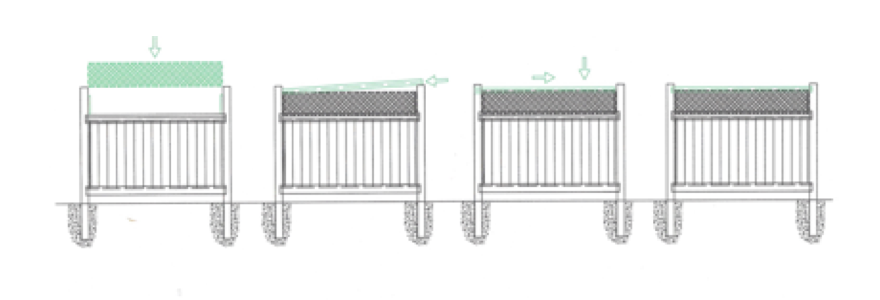
5. INSTALLING T&G BOARDS
STEP 1
Center and install u-channels between routed holes on each post or install u-channels to the center of the two sides of the T&G Board.
STEP 2
Bottom Rail: Install rail into bottom holes of post, groove side up.
STEP 3
Privacy panels: Slide panels into place on bottom rail from right to left. Ensure tongue and groove of each panel lock together.
STEP 4
Top rail: Install rail into top hole of post, groove side down, sliding over last panel at an angle, and into adjacent post. Lower down rail onto the panels and slide rails as far as possible into the first post. Continue to push the rail down, sliding rail into second post.
For Privacy with Lattice
Lattice channel: using 3 of the self tapping screws provided install one piece of lattice channel onto the center of the top of the middle rail. Also install on the underside of the top rail.
Follow Privacy sections instructions until panels are in place.
Mid Rail: Install as per Privacy top rail above.
Lattice: As far as possible, insert one end of lattice into slotted post while lowering the lattice into the upper channel of the mid rail. Center the lattice between posts making sure it remains slotted into both posts.
Top Rail: Install as per Privacy, ensuring Lattice is fully engaged in channel.
Repeat these steps until all panels have been assembled.
6. REINFORCE GATE POSTS
Install hinges and latch prior to pouring concrete. Reinforce hinge and latch posts with 2-6’ pieces of #4 rebar.
Tape off ends of rails that will be joining the gate posts-this will prevent concrete from filling rails.
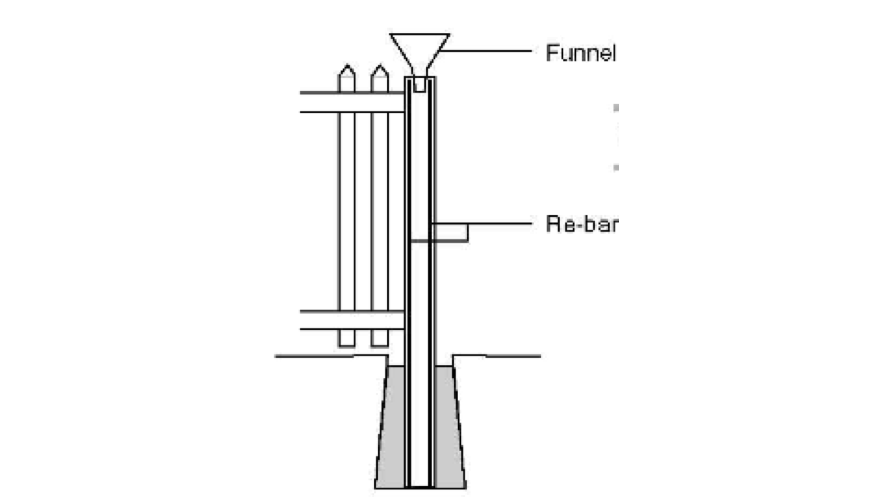
Pour concrete into posts, tamping occasionally to remove air pocket.
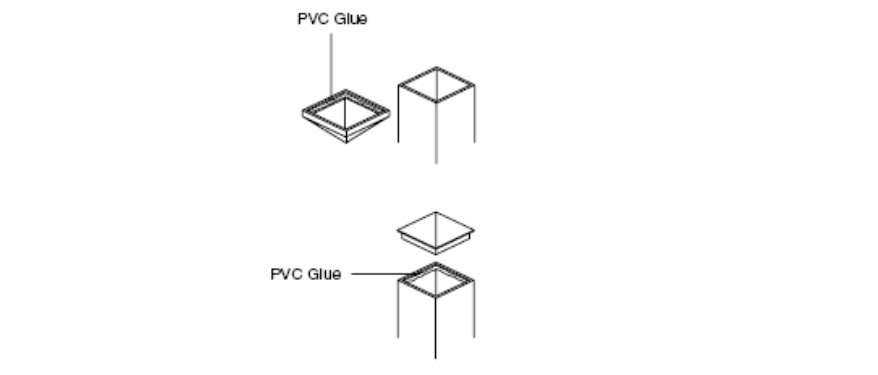
7. ATTACH THE POST CAPS
Glue caps onto the posts with a UV-rated, “hot glue” classified PVC adhesive.
8. CLEAN UP
Clean PVC material as necessary with a non-abrasive (or slightly abrasive) mild biodegradable soap and soft plastic scouring pad. Rinse thoroughly with clean water to remove dirt and soap.


