
- All
- Product Name
- Product Keyword
- Product Model
- Product Summary
- Product Description
- Multi Field Search

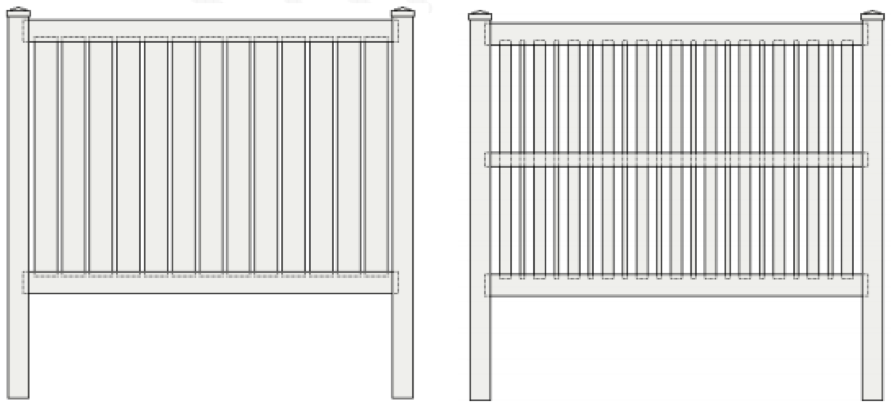
When you are decorating the courtyard, you may want to create a more private environment for yourself, but don't want to be too closed. At this time, you may need to consider a semi-privacy fence. The semi-privacy fence not only protects your privacy, but also keeps the air flowing, making it a great choice. Installing a semi-privacy fence is also very simple. This article will introduce you to the specific installation steps for the semi-privacy fence.
WHAT YOU’LL NEED TO PREPARE
• Power auger or post hole digger (clam shells)
• Shovel
• Digging bar (optional)
• Bright colored spray paint
• Tape measure
• Rag and cleaner
• Cordless or power drill with drill and screw bits
• Safety glasses and work gloves
• PVC adhesive
• Chop saw or circular saw to cut rails (if applicable)
• Table saw or circular saw to cut pickets (table saw recommended)
HINTS
• To ensure proper post spacing, make a jig measuring 92” long from a wood 2 x 4.
• Set all corner, end and gate posts first for proper alignment. This also allows you to
get the height on all posts precise, by running a string line from post top to post top.
FOLLOW THESE IMPORTANT STEPS BEFORE YOU START
•Locate property line. You can find these by locating a pin placed in the curb in the front of your house or by a stake buried in the ground or by a T post placed in the back. If you can’t find any of these then try and locate a plot map. Otherwise you will have to hire a surveyor to locate your property lines.
• Check your local city codes regarding fence locations in the front of the house some cities may restrict you to a 3’ or 4’ height limit also check for overall fence heights in your city. A permit may be required for fences that exceed 6’ in height.
• If you live in an HOA, make sure to have your fence color and height approved before installing. This will save you money and possibly delays.
PREPARE FENCE LAYOUT
STEP 1
Locate your property lines
STEP 2
Drive stakes into the ground just beyond where the posts are being placed and off center of the property line. Stretch a string from stake to stake.
TIP: Run string line 6”- 8” above the ground for less interference.
STEP 3
Mark the location of each post hole. Locations should be 73” on center for 6’ sections and 97” on center for 8’ sections.
TIP: Use spray paint to mark hole locations. locations.

SETTING THE POSTS
STEP 1
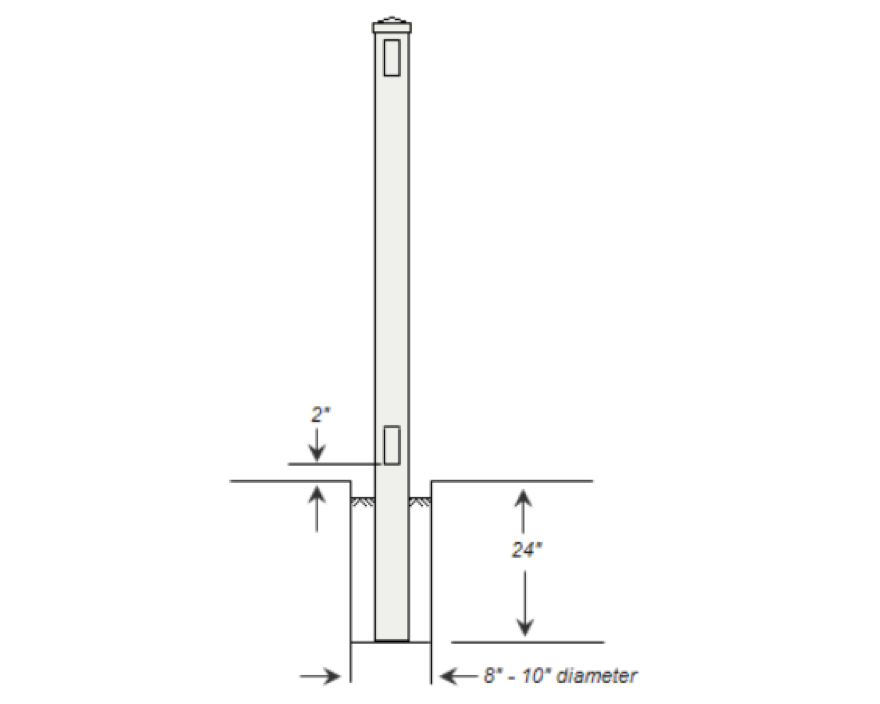
Dig holes approximately 8”- 10” in diameter and 24” deep.
STEP 2
Place the column in the center of the hole and align it with the fence line. Check that the columns on two adjacent sides are level. Adjust your fence if there is an error. It is recommended that you set the column from the bottom of the bottom rail to the floor.
STEP 3
Concrete was poured around the column and filled 2 inches underground. If you're using mixed concrete, just wet it a little, so you can set it up faster and reduce the chance of tilting due to the wind. If you are using dry concrete, pour 1/3 of the bag into the hole and mix with some water. Repeat this step until filling.
TIP: An extra person will make setting posts not only easier but faster as well.
PANEL ASSEMBLY – BOTTOM RAIL
STEP 1
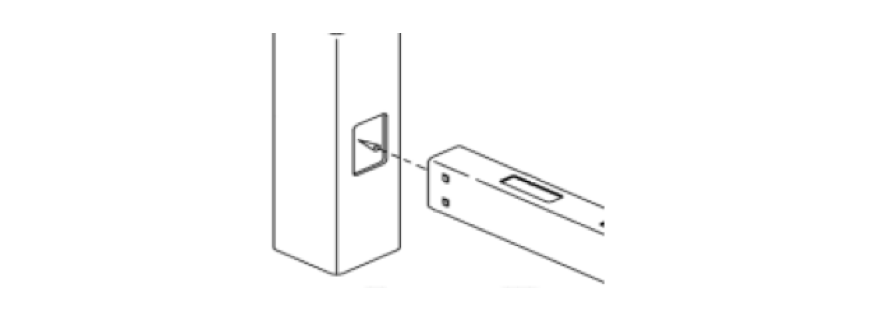
Slide the bottom rail into the post. The notches on the rail lock the rails in the column. If your rails are notched, you can rent a slotting tool or screw the rails. If you have to cut the rails, try to keep the cuts equal and cut them 3 inches longer than the post, so that the correct insertion is possible.
PANEL ASSEMBLY – PICKETS
STEP 1
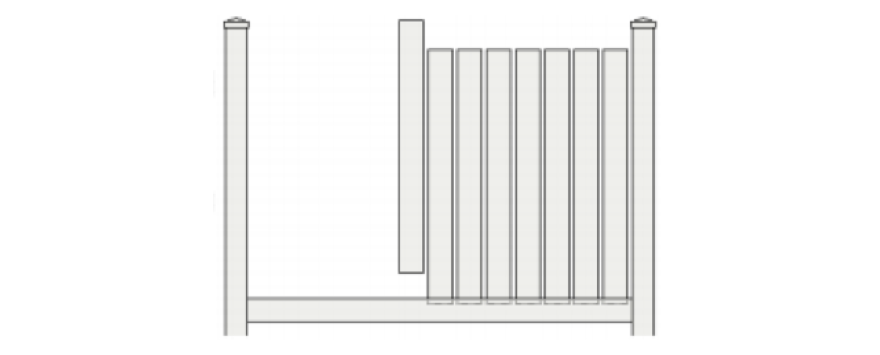
Starting at one end, insert the pickets into the bottom rail and move down the panel.
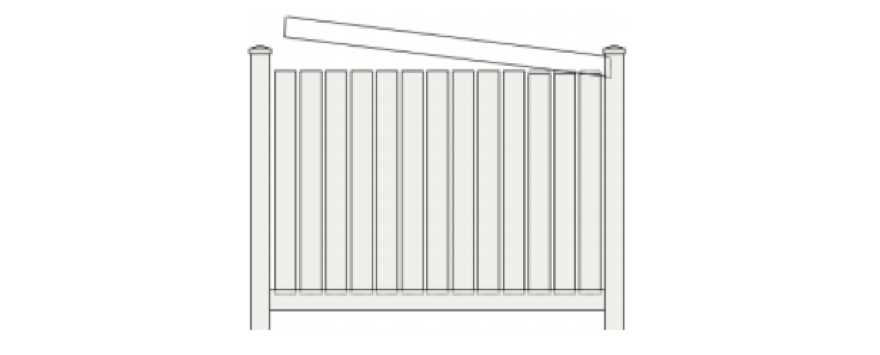
PANEL ASSEMBLY TOP RAIL
STEP 1
Place the top rail at an angle and place it on the picket. Slide the rail into the post. Place the rails on the remaining pillars. Eventually the slide rails slide down completely into the opposite column.
Note: If your rails are not pre-cut, you can rent a slotting tool or use a screw to secure the rail.
POST CAPS
Apply a small amount of PVC glue to the inner rim of the cap and place onto the post. Make sure the cap is firmly in place.
TIP: Place only one or two dots of glue this is sufficient for holding the cap on and will allow removal if needed.

CLEANING
There will be some vinyl residue and dirt on the fence during the installation process. In this case, you can spray it out with a hose. But for more stubborn stains, you can use some non-abrasive pad cleaners. This is also the way you will maintain the fence on a daily basis.
Protect the railway with screws
step 1
To secure the bottom rail, you can screw the screw into the rail wall and at an angle to the long end of the rail. This will act as a gap and securely hold the rails in place.
Step 2
To secure the top rail, simply screw the screw into the top rail next to the column at an angle. This secures the rails in place and is easy to remove when necessary.
If you want more information, feel free to follow our website and we will post some useful articles with our customers' feedback.


